Working on an Excel spreadsheet certainly makes our lives easier. After all, it’s a great place to order your data and have a look at it at a glance. However, sometimes, when you are using Excel, you end up realizing that you need to add some rows of data. It may either be because you forgot about them or because this is the way you need to do the task you are completing. No matter the case, you need to know how to insert multiple rows in excel. And the best part is that this is extremely easy to do.
Check out rounding.to to round up and down numbers.
One of the best things about using Excel is that this simple program allows you to insert multiple rows at a time. But even if you just need to insert one, the process is the same. So, let’s get started.
How To Insert Multiple Rows In Excel
When you are looking to know how to insert multiple rows in excel between data, you just need to follow the next steps:
Step #1: Select the row below where you need the new rows to appear.
Step #2: Use your mouse to right-click on the highlighted row and then just choose the option “Insert”. Notice that when you do this, Excel will only insert one row above the row that you previously highlighted.

Learn how to round the nearest whole number.
Step #3: In case you want to add multiple rows instead of just one, you can simply choose the number of rows that you want to add to your spreadsheet. In order to do this, you just need to hold down the “Shift” key on your keyboard. Notice that this is the same no matter if you are using a PC or a Mac.
Let’s say that you want to add 6 new rows to your spreadsheet. To do so, all you need to do is to select 6 rows while you hold the “shift” key at the same time. It’s important that you are aware that for this, you can select rows of your spreadsheet that already include data on them. The reality is that you will be inserting the new rows above the ones that you just selected as one singular group and they won’t be added above each individual row.
Step #4: Now, you just need to right-click inside the selected area and then click on the “Insert” option.
Step #5: You will see the new 6 rows appear on your spreadsheet right above the selected 6 rows.

Learn how you can use the Excel VBA round.
Adding Empty Rows Between Multiple Data Lines
There are a wide variety of things you can do in Excel. And sometimes, you may find the need to add empty rows between multiple data lines.
Again, you can do this in different ways.
Let’s say that you don’t have a lot of data. In this case, you just need to keep the Ctrl key pressed and then manually select each row with data by simply clicking on the row number.
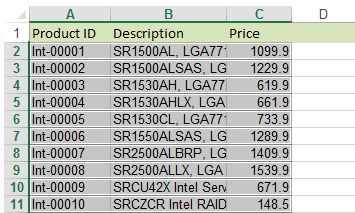
Then, just click on the Insert button at the top.
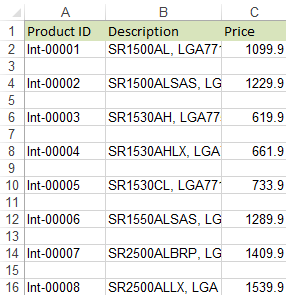
In case you are dealing with a long list of data, then a better approach would be to create an additional column that you can call a helper column. All you need to do is to enter 1 and 2 in the starting cells, grab the fill handle, and then drag it to the last data cell.
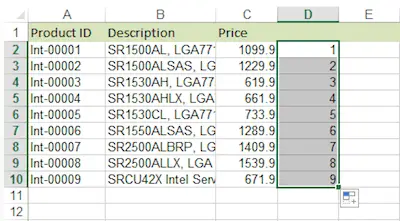
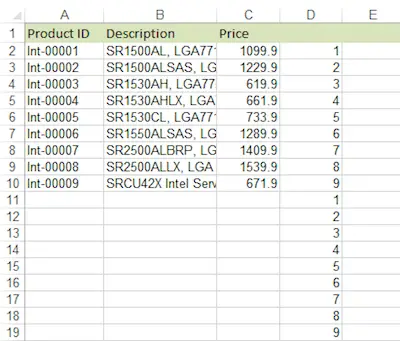
Now, just copy the series from your helper column and paste them right below the last cell.
Why you need to know how to round numbers.
At this point, you should select the entire table and then go to the Data tab and click on the Sort button. You should now see a window. You should choose to sort by your Helper column (in this example its column D) -> Values -> Smallest to Largest.
Just click OK to see the results. You can now delete the helper column.